Casting Class - War of the Lillies 2005
Here are some notes on the bronze casting class that was held at the SCA War of the Lillies event, 2005, in Kansas City, MO.
I wanted to share my experience here in order to help those who might want to do a similar class.
The firing pit
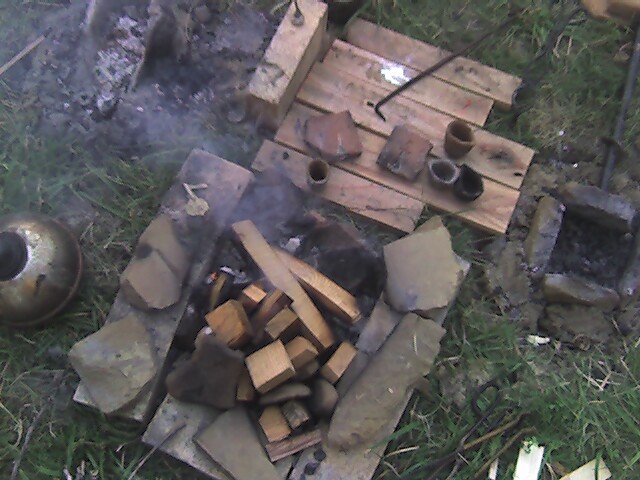
I had 5 students, each making at least 2 moulds, some 3. Some did lost wax and others did piece moulds. Wax models were made by pressing forms into wet clay and casting wax patterns which were further refined. I did 8 castings myself -- 2 piece moulds, 5 stone moulds, and 1 lost wax. All materials (clay, sand, sandstone) were gathered on-site.
Moulds
For the moulds we used 1 part clay and 1 part fine sand for an inner core (to pick up detail) and a 1/1/1 clay/sand/sawdust mix for the outer core. In a few cases, this resulted in students making the overall mould too thick and cracking resulted. Better instructions and closer observation on my part would be better for next time.
As a whole, the piece moulds came out the best because they could be observed after pressing in. This was because the students were not quite use to pressing clay blindly around the wax models and several failed to press it close or tight enough, resulting in loss of detail. This is sometimes hard to get the hang of the first time. A few did not get sprued properly and shrinkage occured. I think the clay should have been kneaded/wedged a lot more before we used it and it would have not cracked as bad as it did in some instances
Moulds were dried for 2 days before firing. On the first batch we poured, the mould fire died too quick and the moulds were too cold when poured. On the second batch we made the mould fire bigger and pre-heated them in the back of the hearth before-hand and this seemed to work better. Moulds were fired for at least 2 hours in a charcoal fire.
I tried one casting where I pressed a very thin layer of clay/sand/sawdust around a wax model and fired it within an hour just to see how it would work. It turned out well, except for notquite filling due to the mould not being hot enough. It did not crack and the detail was almost as good as the clay/sand ones. I figured the holes left by the sawdust burnout would create a rough texture and that the fast turnaround time would result in cracking, but it really didnt seem to matter much.
The stone moulds were just an experiment using the very rough sandstone found on-site. I got a few good castings but most froze prematurely due to insufficient pre-heating. We did a couple of open-face casting and they turned out alright but would have been better if they were deeper and the moulds heated a bit more.
Students came back in the evening for pouring, in shifts over 3 evenings. This cut down on a mass of people around the fires. I did all the pouring this time because they wanted me to, and I hated to risk a miscast due to inexperienced pouring at that stage.
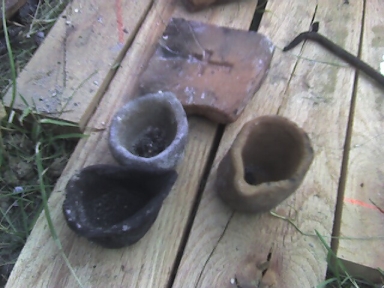
Crucibles
Hearths
I made 2 hearths, one of sandstone and one open-ended "Anders Style" of clay/sand/sawdust. I didnt notice any difference in the performance of the 2, however we used the clay one more because I had the new bellows hooked up to it. We used charcoal mostly and after the first days (nights) pours I increased the wall heigth from 4" to 6" becausethe fuel kept burning out under the crucible. The next night we found that we needed a lot less airflow -- we werejust burning up fuel. This was mostly due to the new bellows being so much more efficient than the old pair. The hearth temp only needs to be a soft glowing red for most of the heat, requiring verylittle air, until the very end of the melt. Even then, it doesn't need much more, perhaps up to an orange heat.This is because it takes a long time for the heat to transfer into the crucible. It has to go very slowly and tryingto go fast will only burn fuel. I found that I could probably make my bellows half the size they are currently.
I would also make the open back of the hearth a bit longer to help pre-heat moulds on. This one was too short and itwas hard to get the moulds on it. If you didn't have to pre-heat the moulds, you could make the hearth completely enclosed around the crucible and probably improve efficiency a bit.
Cast pieces (yeah, its out of focus, sorry)
Overview
Overall I would deem this a success. The class was to be more about the process than on creating a finished piece, butI think every student but one came away with at least 1 good piece. We all learned a lot and had fun and didn't set anyone on fire. Things I would do different:
- Clay hearth longer and taller
- have students use predetermined models to cut down on odd spruing and filling issues
- bigger mould fire for burn-out and firing
- clay needs to be wedged longer
- smaller bellows and/or less airflow
- better pre-heating of moulds just before firing
- only run 1 hearth at a time
- no firebricks! make it look more authentic
The Word document of class notes can be found here.
Detailed account of making a saucer brooch here.